
Showing posts with label Robyn Osborn. Show all posts
Showing posts with label Robyn Osborn. Show all posts
Tuesday, September 29, 2020
Robyn Osborn's "flower" journal "A garden" by Janie O'Brien

Tuesday, August 11, 2020
Flowers for Robyn!
by Lisa for Robyn
I've got into the habit of not checking which journal is coming to me next - anyone else doing this too? It makes it nice to get a surprise in the mail!
So when I received Robyn's Flowers journal it was indeed a nice surprise. Inspiration came quickly for this, as I'm currently making some sunflowers for a canvas that I'm doing. I had extra petals left over so thought, yes! That's what I'll do!
I even remembered to take some progress pics, woo hoo! 😄

So these petals are made from recycled teabags, that have been dried, emptied, and glued onto either white cartridge paper, or an old school dictionary. I then watercolour the papers, and cut them out.
For my background, firstly I covered the journal pages with a layer of torn cartridge paper. Mainly because Robyn's journal is made of signatures, and I wanted the two pages to stay together.
Then I added teabags to the background. Same method as above, except the empty teabags were cut into circles, and glued directly onto the cartridge paper background. Overlapping the circles gives a really interesting effect!

The beauty of gluing teabags is that, because they're porous, you can just plop them down on your page and glue over the top instead of having to glue each piece from the underside. Genius! I use matte gel medium for my glue.

After gluing the background, I added a few layers of blue watercolour. Some colours react better than others, and the colour that you end up with also depends on the type of teabags you've used!
Next I added the sunflower that I had made. The centre was cut from another piece of cartridge paper and teabags, then watercoloured, and tea leaves added for texture.

A leaf and stem were also added to the page, created the same way.
My spread was almost done, but I wanted to add some text. I couldn't find my letter stamps - put them away somewhere during an iso tidy up 😩... So instead I grabbed a scrap of cartridge paper, ruled it into rectangles, pencilled my letters in, and scribbled them in with a Pitt pen!


After I cut them out, I outlined and smudged them with a water activated pencil. Easy peasy!

And this is the end result! I think it's a happy little page, which we really need right now. High fives to the other Victorians putting up with Stage 4 restrictions, and well done to those living in other states for keeping it at bay - please don't get complacent though! 💜💛

Hope you like this Robyn! Happy Arting everyone.
Cheers, Lisa xx
Wednesday, June 10, 2020
Flowers for Robyn.
Daisies are cheerful, roses are posh.
Weeds are unwelcome but I love the lot.
As they greet me each morning, as I go on my way,
they brighten the garden and make my day.
I didn't take many photos of my process for this entry in Robyn's flower journal.

However, basically I put down a layer of gesso followed by soft yellow and turquoise acrylic. Once that had dried I added some Tim Holtz tissue papers and napkin flowers. Once that had dried I stippled it again until it was nicely blended.

I added an F for flowers, plus a few paper flowers made from an old calender.

Finally a few words and dots, and it was all done.
Plant a garden and plant happiness.
Keep well and stay safe.
Plant a garden and plant happiness.
Keep well and stay safe.
Monday, May 11, 2020
Fabulous Flowers by Jenny
Mostly I just sit around all day, being fabulous!

The big daisy is Darkroom Door's Carved Flowers Stencil used to create the main shape, then I overpainted it, one dot at a time to give it a fuller, more rounded appearance. Some of the spots are heated embossing powder... I was adding it to the bees and couldn't help but add some to the flower as well :)
The main word, Flowers, is created using Dina Wakley Media Alpha Parts Stencils with various colours of Ranger's Embossing Powders. I prepared the area using the clever Ranger Anti Static Pouch, painted on a Clear Embossing Ink then scattered over the colours to create an abstract blend. After melting, I added a light pink for the highlight and used a black marker for the shadow.
The little girl sitting around being fabulous, is one of Tim Holtz's Idea-Ology Paper Dolls, she's holding a bouquet from Tim's Idea-Ology Botanical Layers. A few other elements were collected (some made, some Tim's die-cuts) and glued in place using matte medium. The quote is from the Dylusions Colouring Sheets Borders, a fun set of edges and sayings!
The bees, honeycomb pattern on the edge and faux script in the background are stamped in place using Ranger's Archival Ink with Tim's Entomology and Darkroom Door's Buzzing Bees stamp sets. Some of the bees have Distress Embossing Glaze (translucent embossing powder) over their bodies plus wings and bodies coated with Ranger's Stickles Glitter Glue.
Its a fun colourful page, I hope Robyn likes it! I'm quite happy with it :) Daisies are such friendly happy flowers! What's not to love about gorgeous little bees? They're amazing little creatures!
Thanks for looking! Have a wonderfully happy arty day!
:)
Jenny
Friday, March 13, 2020
Champagne and Roses

Robyn's delightful Flowers journal has arrived and was a joy to play in.

I started with black gesso and a monochromatic idea. I pulled out an assortment of pink papers and floral dies and decided on collage. Cut out some botanic shapes from recycled foil tops and added them. Finally I added some doodling in black and then pink posca's.
Saturday, January 11, 2020
Maasai Costume / fasion

World fasion, hmm I am about as up with fasion as I am american football, and that is zilch. However traditional costumes interest me and I was flicking through a magazine with striking Maasai women and they have distinctive costumes, layered free flowing fabrics, fine beadwork and very little hair.

Once I sketched it and added some watercolours I looked them up and found some sisters who are sadly oppressed and need help. If you would like to support the Maasai girls education fund please do.
Its not a very bright and cheerful page but the world is not always a very bright and cheerful place.
Saturday, September 21, 2019
World Fashion for Robyn Osborn by Janie O'Brien. Only one photo this time of my completed project.
 |
| I changed my mind multiple times about various themes for this project and revised once again when I received it, as there was a fairly wide gap in the middle where two signatures met. Instead of having one wide page, I instead chose to do 2 separate pages which would would the layout better. I have always taken an interest in fashion as my father ran a fashion house from the 1930s through to the 1960s in Melbourne. In the 1960s "the times they were a changin" especially for fashion and the beautifully tailored outfits Louis and Charles Noble created in Flinders Lane soon prompted the two brothers to take retirement, and let mini skirts take the reins. My interest remained and dad taught me to sew like a professional. I loved designing clothes but I was not a distinguished seamstress. Current fashion tends to dismay me somewhat and has become somewhat OUTLANDISH and extreme by many so called artistic coutures. Poor dad would turn in his grave if he could see what was considered high fashion now. The representations above have both been taken from AfroStyle on-line magazine which I follow with interest. It is an African and multicultural fashion and style publication which is a bit off-centre which appeals to me. The two pictures I have used represent this new outlandish style, the sort of thing that can be seen on the red carpet at events in the high couture industry. Naturally, I added my artistic touch to embellish the pictures by adding 3D pearls, diamonds and gold. Robyn I hope you enjoy my pages. |
Wednesday, September 4, 2019
AASJ7: Sharon's Pages in Robyn's "World of Fashion" Journal
Hi Everyone

Sharing my pages in Robyn's "World of Fashion" Journal.
I was going to do something more "traditional" and probably what would be more "expected" but LOL it's ME and I don't do normal and standard LOL!

Sooooo I've gone with Victorian "Science Fiction" AKA "Steampunk" fashion and I've done a spread which is pretty much the same as I did for the August 2017 "Dot to Dot" challenge we had at the group! I added wording for a more "fashionable" quote!
I started by black Gessoing the pages in Robyn's Journal - black is a fab background to work with for a change! When the gesso was dry I adhered a strip of torn encyclopaedia page to one side and trimmed once dry.

I added a thin layer of white paint, black coloured texture paste through a stencil and a text rubber stamp by Blank Page Muse to the background. I added some bits of washit tape and edged the pages with a blank ink pad.

Main image is a collage element from Gecko Galz and the wording was computer generated.

Hope you like what I have done in your journal Robyn!
Sharon
Saturday, August 17, 2019
World Fashion with the Australian Home Journal of 1938

For Robyn's theme of World Fashion, I've used an original page from the Australian Home Journal magazine, published in 1938. Amidst cries of 'oh no, you didn't' and 'why didn't you photocopy it' from my historical fashion loving Mum (retired dressmaker and designer), I cut up all the elements of the page including the children with their captions and mini-me pattern overviews. Its not like I've used a page from her collection (yes, she has this one and omg, no way, I'd never do that).
Besides, its beautiful paper, worth preserving in a wonderful art journal.


Torn and put back together using a matte medium gel. I then used some washi tape in similar tones... pink, green with roses and stripes - and all seems to suit a pjs theme well :)

Using the Ranger Ink Blending Tool (with round foams), I blending through 2 stencils from Tim Holtz, Lace and Flourish.


Using my trusty Tim Holtz Craft Pick (sharp pointy awl type tool), I poked a hole in the top of the machine, about where the eye would be.
I've wrapped a length of cotton quilters' thread around the spool, threaded it through the eye to the back, and laid it along a strip of glue down to the needle.


I love these illustrations, they remind me of the kids in Enid Blyton's stories like Famous Five and Enchanted Wood! Check out their little slippers, so adorable.
Thanks for reading! Hope it makes you smile too :)
Happy Creative Day!
:)
Jenny
Tuesday, July 2, 2019
The girls from egoli

Egoli is the alternative Zulu name for Johannesburg, South Africa.
Anyone who has ever looked in my wardrobe would know I'm no fashion guru.
So I took my inspiration from my mother, who had a great passion for quilting and all things Africian.
I found these lovely ladies in one of her quilting books.
(Quilting Africa by J.Williamson and P.Parker)

I had intended to fabric collage the outfits but couldn't find what I really wanted, so I decided to just paint the whole thing.

I did some stencilling to add interest to the background and placed some washi tape depicting the world at the top of the page.

Bit of gold lettering and all done.
Hope you like it Robyn.

I did some stencilling to add interest to the background and placed some washi tape depicting the world at the top of the page.

Bit of gold lettering and all done.
Hope you like it Robyn.
Saturday, June 8, 2019
Time for Tea with Robyn
This is my entry into Sharon Rogers Time for tea Journal

I digitally placed the photos onto a background
then added some digital decorations table and teapot
and some other programs I had hope you like it Sharon xx
Friday, June 7, 2019
Robyn’s World Fashion Journal

I chose Paris France for my theme in Robyn’s journal.

Before adding everything I painted the pages blue, white and red to represent the country’s flag.


I then sketched a lady with a beret and coloured her in with alcohol markers.

I wanted to include modern and classic French designs, as well as the red beret with the blue and white horizontal striped top, thought of by foreigners as the typical colloquial clothing worn by Parisians.

I feel their daytime wear is beautiful, effortless and fresh.
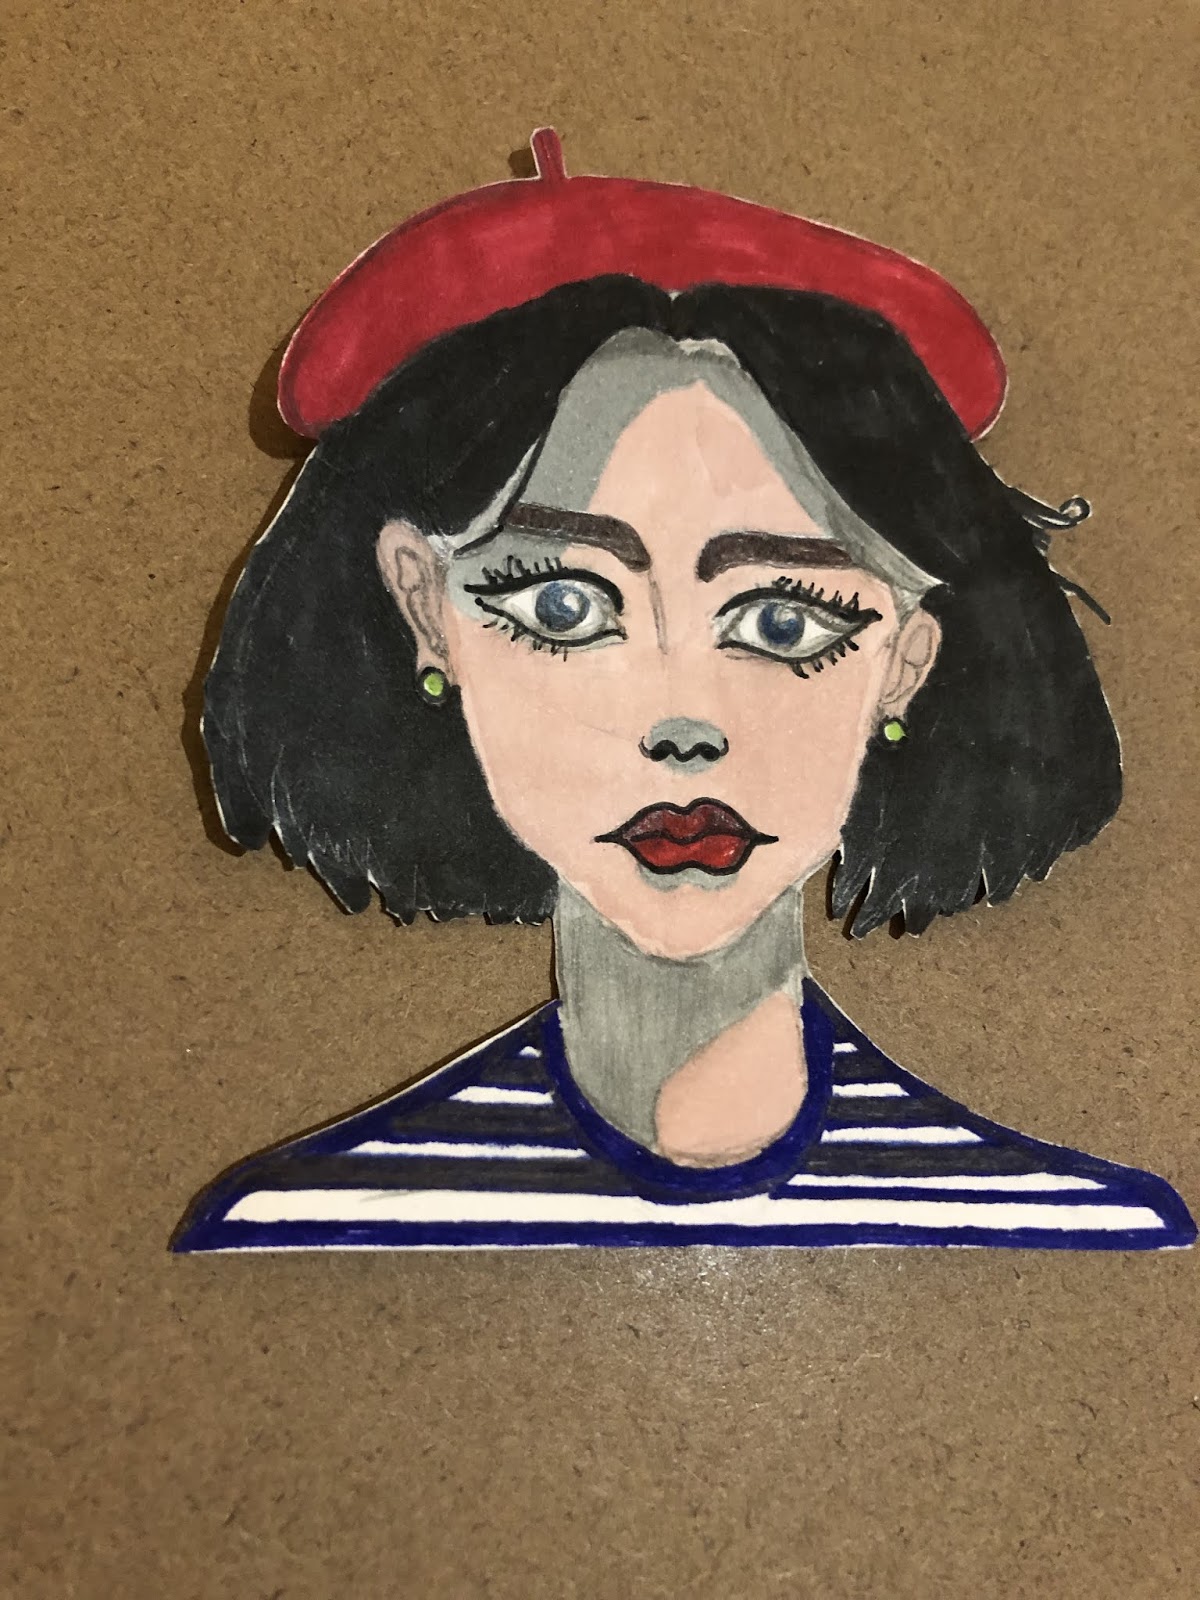
While the fashion can be toned down, at the opposite end of the spectrum one will find that French designers like to liven up their concepts and take their visions to a whole other level, called avant-garde, these show stoppers are magical and spectacular.


Subscribe to:
Posts (Atom)