Showing posts with label Jenny. Show all posts

Monday, May 11, 2020

Fabulous Flowers by Jenny

Mostly I just sit around all day, being fabulous!

flowers and bees with lavender and leaves art journal page by Jenny James of Australia
This is my journal page inside Robyn's beautiful book for "World Flowers". It started off as basic shapes formed from Darkroom Door and Tim Holtz stencils with Dylusions acrylic paints, then grew from there.

The big daisy is Darkroom Door's Carved Flowers Stencil used to create the main shape, then I overpainted it, one dot at a time to give it a fuller, more rounded appearance. Some of the spots are heated embossing powder... I was adding it to the bees and couldn't help but add some to the flower as well :)

The main word, Flowers, is created using Dina Wakley Media Alpha Parts Stencils with various colours of Ranger's Embossing Powders. I prepared the area using the clever Ranger Anti Static Pouch, painted on a Clear Embossing Ink then scattered over the colours to create an abstract blend. After melting, I added a light pink for the highlight and used a black marker for the shadow.

The little girl sitting around being fabulous, is one of Tim Holtz's Idea-Ology Paper Dolls, she's holding a bouquet from Tim's Idea-Ology Botanical Layers. A few other elements were collected (some made, some Tim's die-cuts) and glued in place using matte medium. The quote is from the Dylusions Colouring Sheets Borders, a fun set of edges and sayings!

The bees, honeycomb pattern on the edge and faux script in the background are stamped in place using Ranger's Archival Ink with Tim's Entomology and Darkroom Door's Buzzing Bees stamp sets. Some of the bees have Distress Embossing Glaze (translucent embossing powder) over their bodies plus wings and bodies coated with Ranger's Stickles Glitter Glue.

Its a fun colourful page, I hope Robyn likes it! I'm quite happy with it :) Daisies are such friendly happy flowers! What's not to love about gorgeous little bees? They're amazing little creatures!

Thanks for looking! Have a wonderfully happy arty day!
:)
Jenny

Tuesday, April 28, 2020

Flight of the Hobgoblin

I found this most awesome stamp set by Pink Ink Designs a while ago, perfect for Louise's whimsical theme. A flying hobgoblin with a bee, leaves and a shoe... goes perfectly with my fave Dylusions stamps and stencils!

The page began as black and green plain paper, good for a night day page. After applying a few assorted patterns though stencils with ink, I added some collage crackle medium... who knows what I was thinking! Sort of turned out ok, much better the next day.

Stamps were coloured, trimmed and stuck down with glue... then everyone's eyes redrawn so they looked in the direction I wanted. The quote is a Tim Holtz stamp :)

There's a fine line between genius and crazy!

Its ended up to look like an interesting page, hope it makes you smile!

Happy creative day to you!


Monday, June 10, 2019

Art Deco Pelican

Inside Roz's beautiful Art Deco address book are many wonderful illustrations by designer, Julian Robinson. One of them is a fabulous painting of two girls swimming at the beach with yachts floating in the distance. The diver has such great balance...

Artwork inspired my painting of antique pelicans and Art Deco design
This illustration goes perfectly with the antique pelican bookends I found made by Edgar Brandt in the 1930s. He created such gorgeous birds from wrought iron, one pair with dishes or bowls, the other pair drinking from a fountain. I'd love to buy them but its a tad out of my budget! lol :)

Acrylic painting by Jenny James of pelicans for an Art Deco themed journal page
Above : I stuck tape down the spine and painted out the address lines with white gesso, leaving the gypsy in the corner.

I then scribbled out bunches of ideas including the pelicans, borders, corner swirls and shells then set to work measuring out where they'd all go. Then I erased it all because Art Deco is all geographic and symmetrical (ish) so I had to at least try to have straight lines!

Acrylic painting by Jenny James of pelicans for an Art Deco themed journal page
After drawing in coils and triangles (inspired by an old light fitting), I then adding a bird flying in from the sea on the right, inspired by a lovely wooden bird from a brooch (might have been a frame). Using my new favourite scissors, I cut out the pelicans printed from the 'net... one of each as I was still undecided about which one to use, I love them both!

work in progress, Acrylic painting by Jenny James of pelicans for an Art Deco themed journal page
I painted the background using acrylic paint in a mix of grey with a tinge of blue, leaving the shapes of the bird, ocean and coils.

Acrylic painting by Jenny James of pelicans for an Art Deco themed journal page
A dark blue was used to paint in the coils and other elements. After trying to match the original print, I made a saner decision and ignored that it didn't match... "it'll be fine" I said to myself (turns out I was right! not bad hey? lol).

Acrylic painting by Jenny James of pelicans for an Art Deco themed journal page
I glued one of the pelicans with the fountain to the page, cutting the "water" to make it shorter, to fit the page.
Where the seas met, I added a zig zag edge / joiner... zig zags are sort of geometric and triangular, therefore in my mind, def Art Deco!

Acrylic painting by Jenny James of pelicans, birds, swimmers, yachts and an Art Deco Sea
Little boats of black and white sailed into the page along the bottom. Much better than little shells!
Easier to paint too :)
After giving all the blue elements another coat, I used white paint to straighten lines.

Acrylic painting by Jenny James of pelicans, birds, swimmers, yachts and an Art Deco Sea
Here's a pic of the whole double page spread. The gypsy doesn't look too out of place either, as if she's keeping an eye on it all.

Thanks so much for reading my blog post. Thanks also to Roz for such a challenging but fun project. I hope you like it Roz!

Have a happy creative day!
:)
Jenny

Saturday, May 4, 2019

An Underwater Storybook

Book Page Art Journal Page for Lisa by Jenny

I'm not fond of ripping up books, even ones I don't like... so I'm grateful to have been given a few sheets as part of a swap. Plus if I (we) ran out, Lisa has kindly put a few unusual book sheets inside the back pocket of her book for us to use.

artwork by Jenny James featuring Book Art with an Under the Sea Fairy Story
To start my page in this fantastic book, I lightly sponged some Tim Holtz Distress Paint in 2 blues (Peacock Feathers and Tumbled Glass) over the page, leaving speckles here and there of the paper. A smart girl would wait for things to dry... I then splattered Dylusions Ink Spray in Lemon Zest and White Linen over the page before misting with water and splattering Dylusions Ink Spray, London Blue. I used the seasponge to mop up the excess liquid.

artwork by Jenny James featuring Book Art with an Under the Sea Fairy Story
When it was almost dry, I lightly pressed a sheet of paper towel over the whole page... ours has wavy lines embossed, so any marks left behind would look like waves.
Still not dry, but why wait? Next I used a spiral shaped foam stamp with light blue Distress Paint (Tumbled Glass) and printed spirals over the page.

Now I had to leave it dry or the page would just get soggy! While waiting, I created my scenery and characters.

artwork by Jenny James featuring Book Art with an Under the Sea Fairy Story
On one of the pages I drew daisies (because it was going to be a garden until I opened the bottle of paint) and dozens of scribbly circles with blue pencil (a regular pencil so it wouldn't disappear if (when) it got wet). Each circle was cut out by hand with scissors, drawing more circles until I felt I  had enough and putting leftovers to one side (they ended up being rocks and seaweed).

artwork by Jenny James featuring Book Art with an Under the Sea Fairy Story
I don't have a before and after photo of the stamped narwhals, crab and books... but this is how they were created ...
I stamped the narwhals and crab in black Archival ink and the books in brown Archival ink. The crab was cut out and had his edges and feet inked with Distress Ink (Walnut Stain, dark brown), while the narwhals had their edges and tummies inked with a grey Distress Ink (Pumice Stone).
The books were blended all over using a warm brown and very dark brown Distress Ink (Vintage Photo and Ground Espresso) and spattered with water, then had black ink brushed over them. The pages of the open book were blended with brown and grey as well, only lightly though as it was really absorbent paper.

FYI, the stamps I used were ... Narwhals by Jane Davenport, Crab by Dyan Reaveley (Under the Sea collection), books by Darkroom Door (Bookworm collection and Open Book frame stamp).

artwork by Jenny James featuring Book Art with an Under the Sea Fairy Story
The background was dry and so to add more book themed elements and create the illusion of seaweed, I used stamps by Tim Holtz and a mid green Archival Ink Pad. The writing you can see is the background image from Tim Holtz's Entomology Set (the gorgeous insects collection) and the halftone dots along the bottom is from Tim's Psychedelic Grunge Set (groovy background images).

artwork by Jenny James featuring Book Art with an Under the Sea Fairy Story
Using a gel matte medium, I glued down torn pieces of Tim Holtz collage tissue "Melange" (its beautiful, full of butterflies, moths and music, perfect for this page). I then fussy cut and tore some rocks and seaweed out of the leftover book pages and stuck them down before gluing down the crab, books, narwhals and bubbles. All with the gel... thankfully it takes a little while to dry as they moved around a bit until everything was where I like it (or was too stuck to move). I then left it to dry overnight, crossing my fingers that the colour of the pages dried much lighter (and it did, phew!).

artwork by Jenny James featuring Book Art with an Under the Sea Fairy Story
The next day... totally dry and the colours were ok again :) The quote on the right hand side are stickers by Finnabair (Sentiments pack), altered to say "Give a Voice to Your Story".
At this stage, I added some of Ranger's Glossy Accents (a 3D shiny varnish) and used Distress Inks to add a bit of extra colour here and there. I also added a tiny paperclip from Tim Holtz's Idea-Ology collection with a Distress Ink stained piece of muslin.

artwork by Jenny James featuring Book Art with an Under the Sea Fairy Story
Glossy Accents was added everywhere... even the books have "water" dripping over them!

artwork by Jenny James featuring Book Art with an Under the Sea Fairy Story
The narwhals had a pretty glitter glue on their horns then a splash of Glossy on those as well. The crab was given shiny eyes and his book dunked in "water" aka Glossy while the bubbles were coated with a Gloss Texture Paste.

artwork by Jenny James featuring Book Art with an Under the Sea Fairy Story
This is when I thought it was finished, ready to post to Sharon... then I had a delivery with a whole new collection of treasures... Tim's Baseboard Dolls and Transparent Wings! The page didn't feel finished anyway! lol :)

artwork by Jenny James featuring Book Art with an Under the Sea Fairy Story
The paper doll sitting on the stack of books is one of Tim's Idea-Ology Baseboard Dolls wearing a pair of his Transparent Wings (with glitter glue underneath). The doll has splashes of Glossy (it got everywhere) and a Distress Ink stained hat. I glued the doll down and lifted her to add the wings, then lifted her again to add the glitter glue to the wings... then once more to add the ends of string underneath. I don't recommend this "technique" but luckily she's a tough dolly and didn't hurt her a bit!

The yellow string (some sort of paper twine) was stained with Peacock Feathers Distress Ink and sprayed with water to get it to blend. Before it dried, I had it curling around on the table, hoping it would dry how I shaped it. Five minutes later it was still damp but I couldn't wait any longer... I glued it to the page using matte gel medium. Then finally, left it all to dry.

artwork by Jenny James featuring Book Art with an Under the Sea Fairy Story
So here it is... my finished art journal page. Its the story of a little crab sharing his books with his fairy and narwhal friends. With the name Tolstoy at the top of the pages that I used to cut up, it could be a real epic!

Thanks so much for reading and checking out my journal page for Lisa. I hope it makes you smile too!

Have a wonderful, happy creative day!
:)
Jenny

Tuesday, March 26, 2019

All About Jenny

by Jenny for Sallyanne

All About Me... this has got to be one of the hardest subjects in the known Universe! So after much deliberation, I started with the one thing I do love... my favourite colour - green.

in the beginning there was chaos on a beautiful green background
In the beginning there was chaos on a beautiful green background... I used Dylusions acrylic paints and blended all over the page then while it was drying, took out my growing collection of odds and ends (stamped flowers, cats, birds and bicycles, Dylusions readymade images (cat, flower, girl on the bicycle) and other leftovers).

I had this idea that I'd be riding a bike with one of Tim Holtz's crazy cats on my leg while other cats, birds and frogs hung out in a pretty garden with the wavy things across the bottom... or something! lol :) It looked nutty, loud and crowded, just like it is inside my head "sometimes"! lol :)

background blending and stenciling, mixed media artwork by Jenny James
What happened was completely opposite. I was sorting through my stencils, picking out the designs that I thought would compliment all the noise, I mean elements, when I picked up an oldie but a goodie (always a fave) - Flossie by Dylusions. She's a pretty groovy silhouette of a girl standing like she'd be holding or having something land on her hand. I stuck her down with a temporary glue so I wouldn't have to hold her still while I blended the paint around her.

When I got this far (above), the whole direction of my page changed... the masking was working well, and other ideas (fresh, not so cluttered ideas) started forming.

Daisies are my most favourite flower (all kinds including Gazanias, Sunflowers, Marigolds and Gerberas)... so including pretty white daisies was the next plan. I was still planning to include some of the elements but maybe not as many.

flowers and girl, Art by Jenny, painted using Dylusions by Dyan Reaveley acrylic paints
The flowers were added to the page using the two sizes of "Spring Bloom" stencils by Dylusions using White Linen acrylic paint. After they'd dried, I overpainted most of the petals with more white paint, leaving some unpainted in the background.
The centres are handspotted with a paintbrush using acrylic paint in Dylusions Slate Grey, Pure Sunshine, Lemon Zest, White Linen then lastly, Black Marble. I then added more white spots all around the flowers.
The inside edges of Flossie has been painted with a wash of Black Marble, to give shape :)

The quotes are all by Tim Holtz... Snarky Stickers, Chipboard Quotes and Metallic Quotations.

The frog sticker hopped onto the page because when I was finished, I realised I hadn't included any frogs! Once the flowers had dried and I pulled off the Flossie mask, I found I liked the page as it was so everything else got put away.

So this is me... Dreamer of dreams, feeling free to fly while creating art from the heart in my happy place!
Tim's quote in the top left hand corner says "We never really grow up, we only learn how to act in public." - who says we need to grow up anyway? lol :D

Thanks so much for reading and checking out my journal page for Sallyanne. I hope she likes it!

Have a wonderful, happy creative day!
:)
Jenny

Sunday, January 20, 2019

Vintage Circus Bear on a Tricycle

This is my page inside Sharon's Vintage Circus journal... the first thing I did was scour the internet looking for vintage circus ideas. But while searching through the really old photos, I found myself getting angry and teary at all the abuse and neglect the animals suffered (at the hands of people who should have cared for them). I printed out a few pictures and attempted to start... but the more I was scribbling and drawing, the worse I felt. 

It wasn't fair how they were all treated... its now all in the past but it will always be remembered. Thankfully, more and more people and organisations are looking out for animals and their rights. I know you all agree, animals deserve our love and respect. Always <3

artwork featuring a bear on a bike and other bears by Jenny James copyright 2019
Drawing them (above) with hats and signs saying "Free the Bears" didn't help. I wanted this to be a happy page, one that was positive not full of anger and hatred at humans. So it was put aside for a week or more because I wasn't coping.

artwork featuring a bear on a tricycle by Jenny James copyright 2019
A few weeks later, with a fresh mind I refound the photoshopped looking image of a bear on a tricycle I saw and used it as a reference as I drew my own bear. He's drawn freehand on Strathmore Watercolour Paper with pencil then inked with fine black felt tipped pen.

watercolour painted artwork featuring a bear on a tricycle by Jenny James copyright 2019
A few days later, I erased the pencil marks before painting with watercolour paint. I used sample spots (swatches) of Daniel Smith Watercolours (saving for the tubes now!) and my trusty waterbrush. The bike frame was painted first, then the wheels, all while reminding myself constantly, to let areas dry before going further.

watercolour painted artwork featuring a bear on a tricycle by Jenny James copyright 2019
The next day, after the bear's basic colours and shading was completely dry, I used a very fine brush (and the same colour brown) to paint in some fur structure, more shading and with a white gel pen, added highlights.

artwork featuring Tim Holtz Stamps by Jenny James copyright 2019
To start off the background, I stamped images from Tim Holtz Stamp Set, Theories. Tim's antique style engravings were perfect for this, as was his quote from the stamp set, Handwritten Thoughts : Always be on the lookout for the presence of wonder. The characters were stamped using Ranger's Archival Ink in a dark brown and the quote is stamped using black.

The background was coloured using an Ink Blending Tool and Tim Holtz Distress Oxide Ink Pads... patchy blends of Antique Linen (cream) and Tea Dye (light warm brown) were first, then splattered and splashed with water (using a Water Spray Bottle) before being dried with the heat tool. Tumbled Glass (pale blue) was blended over the page next, then Walnut Stain (dark brown) was blended around the edge. More sprays of water were splattered and then it was all dried again.

watercolour painted artwork featuring Tim Holtz Stamps by Jenny James copyright 2019
The next stamps to be printed were from Tim Holtz's Psychedelic Grunge Stamp Set. The faded dots across the base of the page were stamped using Tea Dye Oxide Ink. The larger circles were printed using the Tea Dye and Tumbled Glass together, then across the base only using Tea Dye.

watercolour painted bear on a bike by Jenny James copyright 2019
While the inky background was drying, I cut out my bear using scissors and a craft knife for inside the spokes.

watercolour painted artwork featuring a bear on a bike by Jenny James copyright 2019
The above photo shows my bear placed loosely on the page to see how he'd fit. He seemed happy enough so continued :)

watercolour painted artwork featuring a bear on a bike by Jenny James copyright 2019
Next... I stamped the bicycle of three riders (also from Tim's Theories set) onto the bottom of the page, then covered it with washi tape and the matted printout of the vintage poster because I didn't like it! lol :) I added stamped wheels to the left hand side of the page in black after stamping the bicycle at the top. The poster and bear are glued down with Ranger's Dylusions Glue Stick.

To finish off the page, I used a couple of stamps from Tim's Tiny Things 2 stamp set. I gave the bear some music to ride along and "tied" gramophone onto the high-wire with a brown fine felt tipped pen. Both images were stamped using the Distress Oxide Walnut Stain Ink Pad.

historical photo of bears on a bicycle with a sidecar
The back of the page features a picture I found at the beginning of this journey (bordered with washi tape).
While this historical photo is from the era of abused animals, I live in hope that these two were looked after well. They seem ok apart from being skinny and muzzled.
Rather than waste the printout, I've included it with a few thoughts (white gel pen)... Free the Bears!

The end result is a good one... my bear looks content to be peddling along his musical path while the circus world carries on around him.

Thanks for reading! Hope it creates a smile :D xx Jenny

Tuesday, January 8, 2019

Dragonfly Garden with Serviettes

Collage with Paper Napkins for Colleen


For Colleen's art journal page, I've used the Jane Davenport Collage Papers, aka printed paper serviettes... a packet of pretties to use in art. Together with acrylic paint, matte medium, paint pens and glitter glue, I've created a garden with a girl, flowers and dragonflies!

Art by Jenny James, mixed media collage of girl with a dragonfly using Jane Davenport printed napkins
To start with, I tore two of the same serviettes into pieces that fitted around the portrait of the girl (which is printed on the same serviettes).

Art by Jenny James, mixed media collage of girl with a dragonfly using Jane Davenport printed napkins
Using a Matte Gel Medium, I glued all the pieces down around the face... the end result looks like I drew the face and simply added the collage around it :)

Art by Jenny James, mixed media collage of girl with a dragonfly using Jane Davenport printed napkins
Once dry, I painted the shapes of the dragonflies and flowers in lightly using Dylusions acrylic paint (Calypso Blue). Then I filled in the rest of the background leaving the dragonflies, flowers and her hair free of colour (so it showed the serviettes).

Art by Jenny James, mixed media collage of girl with a dragonfly using Jane Davenport printed napkins
Next was the greenery for the garden. I used Dylusions acrylic paint (Lemon Zest, a clean bright yellow) mixed into the remainder of the Calypso Blue I had on my plate. The variation of the green was created simply by adding more yellow to create a lighter green, with some areas using only yellow. Being a semi-translucent paint, it layers beautifully :) The blue flower is left free of green paint showing the layer underneath.

Art by Jenny James, mixed media collage of flowers using Jane Davenport printed napkins
All the pretty white and green flowers were created using foam stamps with acrylic paint (white and yellow). The stamens and centres for the flowers were handpainted spots of black, white and yellow.

Art by Jenny James, mixed media collage of girl with a dragonfly using Jane Davenport printed napkins
Each of the dragonflies had a whitewash over the tips of their wings to lift them off the page. Shadows were added around the hair, parts of the dragonflies and flowers using a wash of black paint. Once everything was completely dry, all the extra details were drawn in using white and black paint pens.

Art by Jenny James, mixed media collage of girl with a dragonfly using Jane Davenport printed napkins
While wandering through my stash of Tim Holtz Stickers, I found some quotes that suited my page perfectly. The super tiny tattoo style stickers I've had for ages work well too... so cute! I haven't added anything else to the original print of the girl except for altering her eyes ever so slightly.

Art by Jenny James, mixed media collage of dragonflies using Jane Davenport printed napkins
Can't really see, but there is glitter glue over the wings...

Art by Jenny James, mixed media collage of girl with dragonflies using Jane Davenport printed napkins
The finished page is full of beauty and wisdom. Thoughts added from Tim Holtz Stickers were 'Shine brightly, be fearless' and 'Do all things with great love.' and my current favourite...
Not only does my mind wander… sometimes it walks off completely.
Finally, I stuck down a quote sticker from Dyan Reaveley says “Never forget your sparkle” (with more glitter glue over the word sparkle, of course).
At the top right, I added some mini banners made from left overs and wrote the letters a r t in glitter glue. There's something magical about glitter :)

Thanks for reading and looking :) I hope it made you smile!

Have a wonderful arty day!
:)
Jenny

Wednesday, November 14, 2018

Crazy Galahs with Wise Words

Pam's Words of Wisdom Book by Jenny

With the Bee Gees playing in the background, I created this page for Pam using acrylic paints, gorgeous printed tissue paper and the adorable Crazy Birds stamps from Tim Holtz.

The quote says :
Allow yourself to be a masterpiece and a work in progress simultaneously.
choosing the papers to use on the art journal page
The first thing to do is not to get sidetracked by all the pretty designs on all the tissue collage papers and just rip it up already! I used the gorgeous Tim Holtz Collage Papers, "Vintage Lace" and "Botanical".

Overview of Tim Holtz Collage Paper being stuck down with matte medium by Jenny James
I used a gel matte medium to glue all the layers down. The tissue seems to disappear within itself and dries to show just the printed design. I painted a smidge of white gesso behind a few areas so where it overlapped, the text didn't take over the flowers.

a splash of blue acrylic paint with a brayer on Tim Holtz Collage Tissue Paper
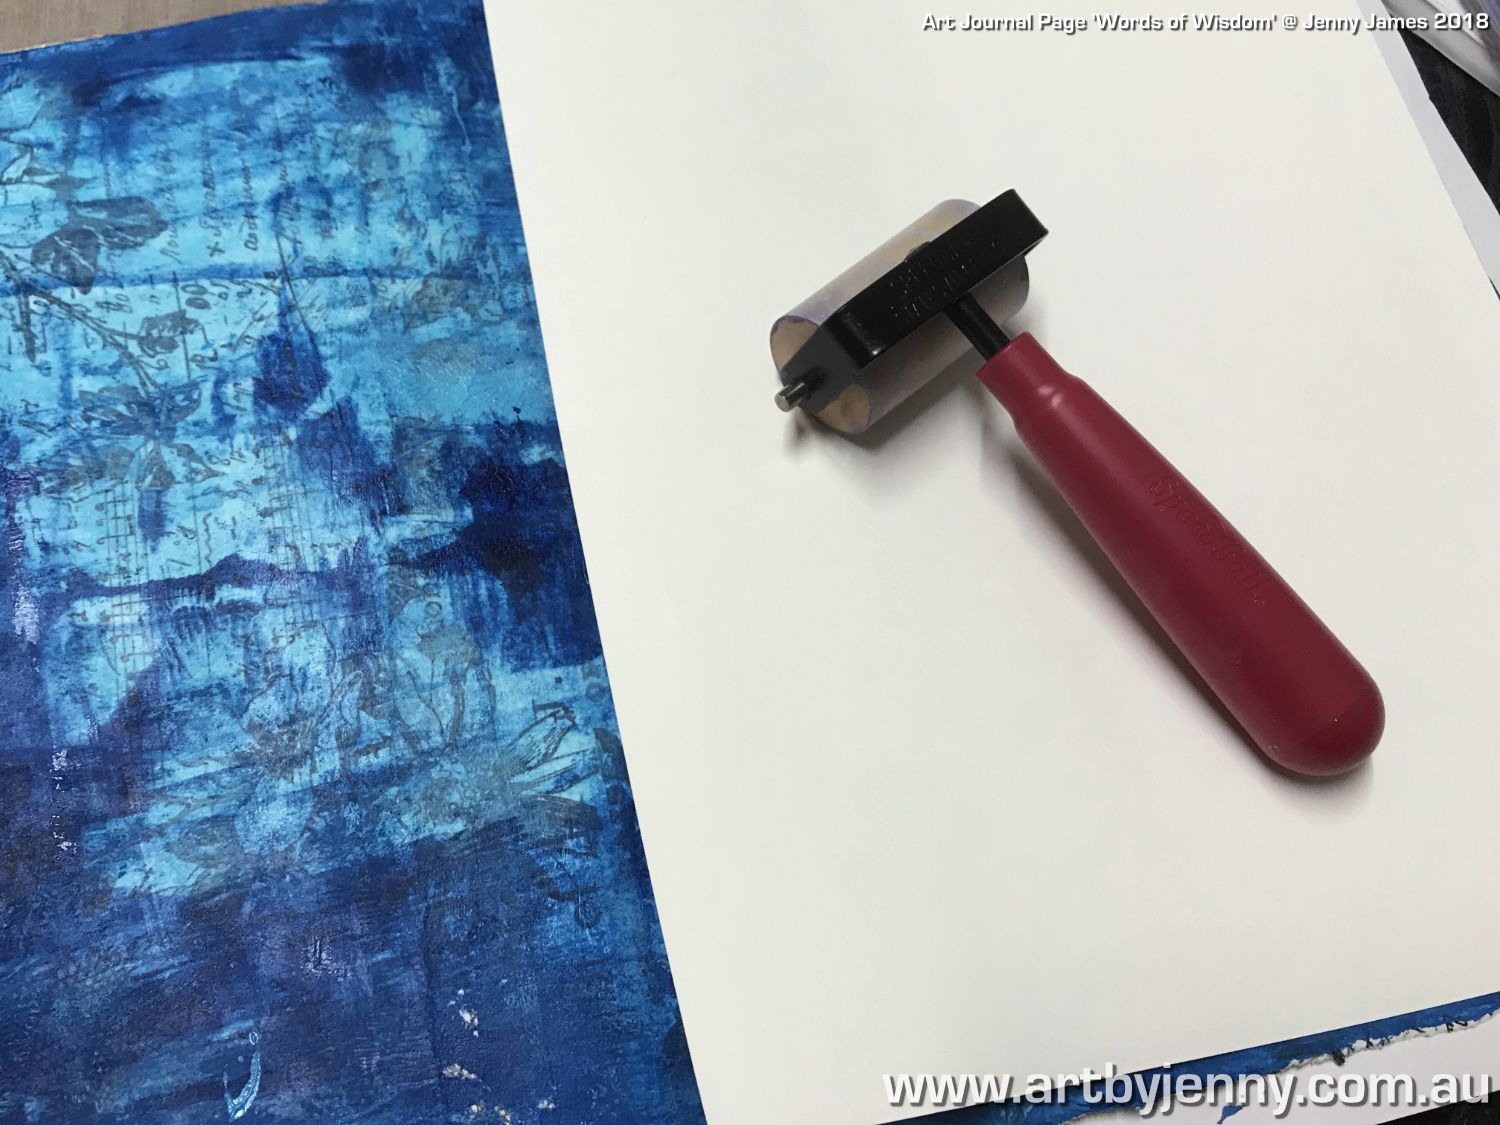
Squirt on splashes of 2 different colours of acrylic paint (I used a light and dark blue). Using a hard rubber brayer, roll the paint over the page, back and forth, up and down, until you like what you see. Not too much rolling though, you don't want to mix the paint, just allow the colours to blend a bit.

close up photo of blue acrylic paint drying
Above is a closeup of the smooshed paint showing the bare areas and gorgeous blends. The next step needs to be done while the paint is still wet.

painting a background using acrylic paint and collage tissue paper
Monoprinting without a linocut or gel printing plate - simply place a spare sheet of paper onto the wet surface of the book. Then using a soft rubber brayer, roll quite firmly. This lifts off excess paint off the page and transfers it onto the paper to use for another day.

painting a printed background using acrylics and tissue collage paper
Above photo is of the page after it has dried. You can use any printed paper (commercially or stamped) under the paint to get a similar effect.
Just like with gel plate printing, every one is different. The various paints, papers, environment (hot, cold, dry, humid, etc), time taken and people's techniques will alter the results.

art journal page by Jenny James featuring a wildflower stencil
Above... the first stencil layer was added using Dylusions Acrylic Paint in Midnight Blue through the Darkroom Door Large Blossom Stencil.

an art journal page by jenny featuring blue acrylic paints and beautiful stencils
I had bit of Midnight Blue left on my craft sheet, so mixed in a touch of Lemon Zest (Dylusions) and blended this groovy green through the Darkroom Door Large Fern Stencil. Using the same green paint, I grew some pine trees in the distance using Tim Holtz Pines Layering Stencil.

Next I added Tim Holtz Wildflowers Layering Stencil using light blue paint, staggering the design across the page, and Tim's Flourish Stencil around the sides and across the top. Then blended dark blue paint through Tim's Blossom Stencil all across the bottom of the page.

How to use a spray bottle to create spatters on an art journal page
While those layers of blue were drying, I splattered on Dylusions Ink Spray in White Linen shaking and tapping the sprayer's straw to send drops flying. The ink goes wherever it wants :)

a beautiful blue garden made of paint and stencils by Jenny
Above shows the page after I've finished spattering ink. So different to how it all started out. I love how even tiny specks of white gives life to all colours.

close up photo of how to use foam stamps with paint to create a page
I decided to make the quote large enough that it would take over the whole page. Using Tim Holtz Idea-Ology Foam Stamps Cut Out Alpha and Distress Paint in Black Soot, I printed out my words.
This photo is here to show how easy it is to line up letters and form words using foam stamps. Hope Tim creates more styles!

Subliminally, it says to you "have a go, try some art, get paint on your fingers" :D

close up photo of black lettering stamped in paint
Some words took a bit of planning as they had multiples of the same letter and I got a bit close to the edges of the page but it all worked out in the end. Tim Holtz Idea-Ology Cling Foam Stamps - Cutout  is a flexible, forgiving font that allows for crooked stamping and letters not lined up!

planning of the art journal page using Tim Holtz Stamps
My friends, the Crazy Birds of Tim, came to join the party... the other stamp sets I've used are Tim Holtz Cling Stamps - Fresh BrewedTim Holtz Cling Stamps - Haunted House (the little here and there sign) and Tim Holtz Cling Stamps - Floral Tattoo (details on the mug). Having the stamps printed on the back like this makes it easier to see what you're doing, or rather, planning...

photo showing placement of the Tim Holtz Crazy Birds and Fresh Brewed images
But as you can see, the birds didn't want to stay where I'd planned and moved my mug but that's ok, they didn't drink all the coffee so we're still friends :) lol

colouring Crazy Birds and Coffee Beans with Distress Inks
I love our Aussie Galahs... To colour everything, I've used Distress Ink Pads dabbed onto a craft sheet, using a waterbrush to pick up the ink and colour in.
All the galahs were coloured with Worn Lipstick and Black Soot, while the coffee bags were coloured with Ground Espresso, Walnut Stain with Black Soot in the shadows. The mug was also Worn Lipstick but using more layers of ink to get it darker, then stamped over with Floral Tattoo using Ground Espresso.

close up of the coffee and mug with the Crazy Birds
I was going to add a splash of Glossy Accents above the mug to show it was hot and steamy, but one of the cheeky birds got in the way!

almost done - Australian Galahs artwork created, stamped and painted by Jenny James 2018
The above photo is of everyone in their final places, stuck down and waiting for the next bright idea. All the eyes were enhanced with black and white paint pens.

completed Australian Galahs artwork created, stamped and painted by Jenny James 2018
After the paints and inks had completely dried, I used a white paint pen to add a few details like the word "in" (next to progress),  couple more highlights everywhere, a flower, and a border of dots, dashes and footprints.

close up of Australian Galahs artwork created, stamped and painted by Jenny James 2018
Thanks for reading and checking out the photos of my art journal page for Pam.

Have a happy creative day!
:)
Jenny