Showing posts with label Mother Tiger. Show all posts

Tuesday, July 30, 2019

Haiku Art - Hungry are the Fish

Haiku Watercolour Painting by Jenny James - Dragonflies Hover Above the Waterlilies Hungry are the Fish
Dragonflies Hover
Above the Waterlilies
Hungry are the Fish
by Jenny James

Who knew I could write poetry? There's a first for everything! My watercolour painting skills are constantly improving, proof that with practice one can achieve anything.

Here's how my page for Pam was created...

Haiku Watercolour Painting by Jenny James - sketchbook image of starting out initial ideas
In the beginning... it always starts with scribbling out ideas on scrap paper then nutting them out in my journal.

Writing a poem with the correct number of syllables was interesting. Once I worked out what I wanted to paint or create (dragonflies and waterlilies) and realised it didn't have to rhyme, it was much easier.

Haiku Watercolour Painting by Jenny James - sketching out the design
It was planned to be a pair of giant gold fish swimming underwater, as viewed if you're also underwater.

Haiku Watercolour Painting by Jenny James - water soluble pencils to start with
Less is more... so I started with water and pencils as I'm always heavy  handed when I use paint. I then waited an eon for it to dry. Well, maybe 10 minutes...

Haiku Watercolour Painting by Jenny James - Winsor and newton water colour sticks
Still trying to be "less is more" but pencils weren't giving me enough paint, so dug out my Winsor & Newton watercolour sticks... I've included this closeup to show the amount of paint used. I love the texture of pencils and sticks!

Haiku Watercolour Painting by Jenny James - waiting for paint to dry
I painted more water onto the page and let it dry again... the second fish decided it didn't want to join us, so that's where the quote is going.

Haiku Watercolour Painting by Jenny James - more layers of paint in blues and greens
"Trust the Mess" ... that's what we're told to do so many times with abstract art and other types of creativity, but its as hard to do as waiting for paint to dry! lol :) Took a couple of hours this time.
This photo is showing what happens when you give up on micro layers and just go for it. Thank goodness its meant to be water hey? At this point, I was happy with the clouds and tiny forest in the background :)

Haiku Watercolour Painting by Jenny James - photo of my workspace
This is my favourite palette! This pic was after adding pink gouache to the petals, brown to the stems and shadows in the water.
Things we take photos of when waiting (again) for paint to dry...!

Haiku Watercolour Painting by Jenny James - work in progress
I really love painting with watercolours... especially when its working! All that's left to do is all the bubbles, the fish's details and other bits and pieces.

Haiku Watercolour Painting by Jenny James - adding details to the fish
Here fishy fishy... a giant goldfish eyeing off the dragonflies above the flowers. The bubbles have white paint pen highlights and brown paint underneath to make them appear round.

Haiku Watercolour Painting by Jenny James - finished picture of dragonflies with giant goldfish among waterlilies
The above pic is my finished painting. Hope you like it Pam :)

Sorry, no progress pics for the dragonflies.... they weren't behaving! Thank goodness the turned out ok... quite happy with the wings.

I used more pencils and dry watercolours to add depth and shadow to everything. The quote is drawn freehand with pale blue pencil then again with black pencil. Then using the blue pencil again, I added extra words to make the dodgy bits look like they were meant to be there (of course they were).

Then the 3 little fishes with their teeny tiny bubbles were drawn in too, just because. The writing is all a bit crooked, but then again, it is underwater! lol

So that's my Haiku Art Page for Pam... Thanks so much everyone for reading my blog post. Hope it makes you smile!

Have a happy creative day!
:)
Jenny

Wednesday, November 14, 2018

Crazy Galahs with Wise Words

Pam's Words of Wisdom Book by Jenny

With the Bee Gees playing in the background, I created this page for Pam using acrylic paints, gorgeous printed tissue paper and the adorable Crazy Birds stamps from Tim Holtz.

The quote says :
Allow yourself to be a masterpiece and a work in progress simultaneously.
choosing the papers to use on the art journal page
The first thing to do is not to get sidetracked by all the pretty designs on all the tissue collage papers and just rip it up already! I used the gorgeous Tim Holtz Collage Papers, "Vintage Lace" and "Botanical".

Overview of Tim Holtz Collage Paper being stuck down with matte medium by Jenny James
I used a gel matte medium to glue all the layers down. The tissue seems to disappear within itself and dries to show just the printed design. I painted a smidge of white gesso behind a few areas so where it overlapped, the text didn't take over the flowers.

a splash of blue acrylic paint with a brayer on Tim Holtz Collage Tissue Paper
Squirt on splashes of 2 different colours of acrylic paint (I used a light and dark blue). Using a hard rubber brayer, roll the paint over the page, back and forth, up and down, until you like what you see. Not too much rolling though, you don't want to mix the paint, just allow the colours to blend a bit.

close up photo of blue acrylic paint drying
Above is a closeup of the smooshed paint showing the bare areas and gorgeous blends. The next step needs to be done while the paint is still wet.

painting a background using acrylic paint and collage tissue paper
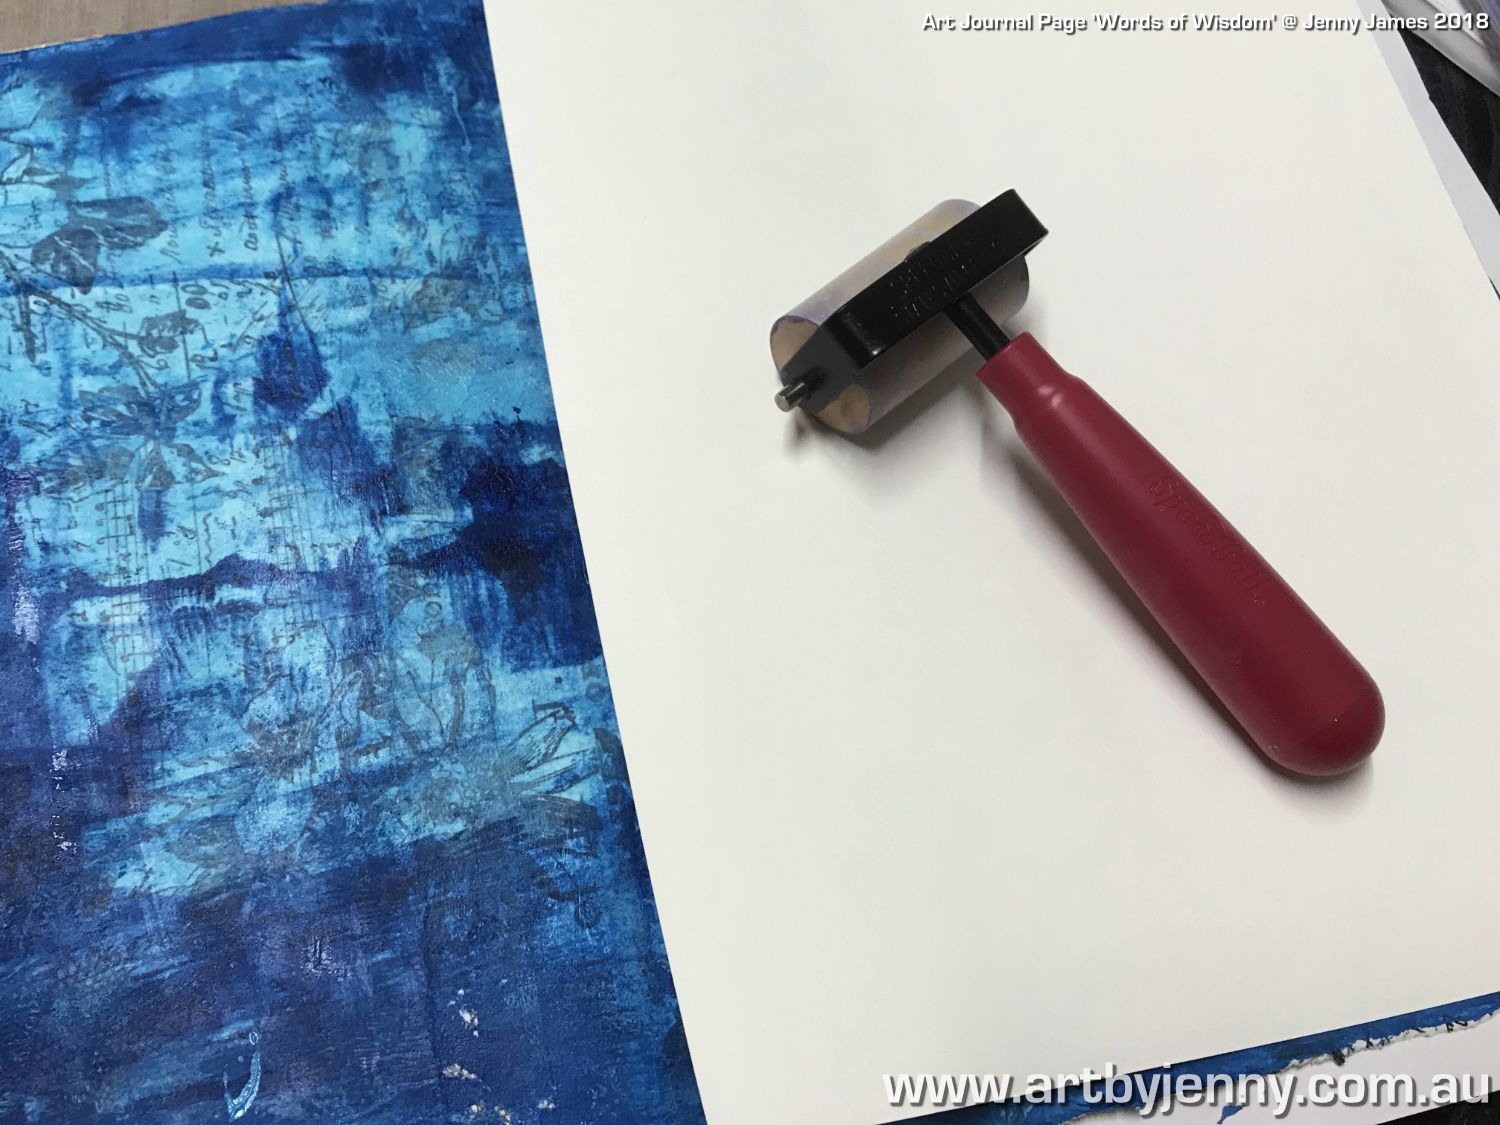
Monoprinting without a linocut or gel printing plate - simply place a spare sheet of paper onto the wet surface of the book. Then using a soft rubber brayer, roll quite firmly. This lifts off excess paint off the page and transfers it onto the paper to use for another day.

painting a printed background using acrylics and tissue collage paper
Above photo is of the page after it has dried. You can use any printed paper (commercially or stamped) under the paint to get a similar effect.
Just like with gel plate printing, every one is different. The various paints, papers, environment (hot, cold, dry, humid, etc), time taken and people's techniques will alter the results.

art journal page by Jenny James featuring a wildflower stencil
Above... the first stencil layer was added using Dylusions Acrylic Paint in Midnight Blue through the Darkroom Door Large Blossom Stencil.

an art journal page by jenny featuring blue acrylic paints and beautiful stencils
I had bit of Midnight Blue left on my craft sheet, so mixed in a touch of Lemon Zest (Dylusions) and blended this groovy green through the Darkroom Door Large Fern Stencil. Using the same green paint, I grew some pine trees in the distance using Tim Holtz Pines Layering Stencil.

Next I added Tim Holtz Wildflowers Layering Stencil using light blue paint, staggering the design across the page, and Tim's Flourish Stencil around the sides and across the top. Then blended dark blue paint through Tim's Blossom Stencil all across the bottom of the page.

How to use a spray bottle to create spatters on an art journal page
While those layers of blue were drying, I splattered on Dylusions Ink Spray in White Linen shaking and tapping the sprayer's straw to send drops flying. The ink goes wherever it wants :)

a beautiful blue garden made of paint and stencils by Jenny
Above shows the page after I've finished spattering ink. So different to how it all started out. I love how even tiny specks of white gives life to all colours.

close up photo of how to use foam stamps with paint to create a page
I decided to make the quote large enough that it would take over the whole page. Using Tim Holtz Idea-Ology Foam Stamps Cut Out Alpha and Distress Paint in Black Soot, I printed out my words.
This photo is here to show how easy it is to line up letters and form words using foam stamps. Hope Tim creates more styles!

Subliminally, it says to you "have a go, try some art, get paint on your fingers" :D

close up photo of black lettering stamped in paint
Some words took a bit of planning as they had multiples of the same letter and I got a bit close to the edges of the page but it all worked out in the end. Tim Holtz Idea-Ology Cling Foam Stamps - Cutout  is a flexible, forgiving font that allows for crooked stamping and letters not lined up!

planning of the art journal page using Tim Holtz Stamps
My friends, the Crazy Birds of Tim, came to join the party... the other stamp sets I've used are Tim Holtz Cling Stamps - Fresh Brewed, Tim Holtz Cling Stamps - Haunted House (the little here and there sign) and Tim Holtz Cling Stamps - Floral Tattoo (details on the mug). Having the stamps printed on the back like this makes it easier to see what you're doing, or rather, planning...

photo showing placement of the Tim Holtz Crazy Birds and Fresh Brewed images
But as you can see, the birds didn't want to stay where I'd planned and moved my mug but that's ok, they didn't drink all the coffee so we're still friends :) lol

colouring Crazy Birds and Coffee Beans with Distress Inks
I love our Aussie Galahs... To colour everything, I've used Distress Ink Pads dabbed onto a craft sheet, using a waterbrush to pick up the ink and colour in.
All the galahs were coloured with Worn Lipstick and Black Soot, while the coffee bags were coloured with Ground Espresso, Walnut Stain with Black Soot in the shadows. The mug was also Worn Lipstick but using more layers of ink to get it darker, then stamped over with Floral Tattoo using Ground Espresso.

close up of the coffee and mug with the Crazy Birds
I was going to add a splash of Glossy Accents above the mug to show it was hot and steamy, but one of the cheeky birds got in the way!

almost done - Australian Galahs artwork created, stamped and painted by Jenny James 2018
The above photo is of everyone in their final places, stuck down and waiting for the next bright idea. All the eyes were enhanced with black and white paint pens.

completed Australian Galahs artwork created, stamped and painted by Jenny James 2018
After the paints and inks had completely dried, I used a white paint pen to add a few details like the word "in" (next to progress),  couple more highlights everywhere, a flower, and a border of dots, dashes and footprints.

close up of Australian Galahs artwork created, stamped and painted by Jenny James 2018
Thanks for reading and checking out the photos of my art journal page for Pam.

Have a happy creative day!
:)
Jenny