Showing posts with label Melissa Guest. Show all posts

Saturday, October 3, 2020

Dance


Ballet is one of those things I have always admired but never really got to know. Attending a big ballet priduction has always been on my bucket list just never acheived in my real life.

I  love the drama and costumes and sets and greatly admire the athleticism and discipline of the dancers. 

The closest I came was when my youngest son attended a ballet school at 3 or 4, he was naturally elegant and coordinated and we went to one performance night  I was super uncomfortable with the sexy aspect of the young girls so we never went back.

Sunday, March 15, 2020

Dancing through Melissa's Ballet Journal

by Lisa for Melissa

Melissa's journal theme is Ballet and I initially thought, what do I know about ballet?  I remember going to a recital when I was little, and more recently watching a friend's daughter perform in Peter and the Wolf.  But what to do?

...And then I thought of one of my favourite ABC shows - Dance Academy.  I love watching people dance, and this series was fantastic.  Great acting, great dance scenes, great themes.  If you haven't seen it, I really recommend giving it a go.  Yes, it's about teenagers, but it's not just a kid's show!

One of the scenes that really stuck with me was just after Sammy died, after being hit by a car on the way to the Opera House to dance in the Prix de Fonteyn.  Tara wanted to dance The Red Shoes in the same competition, which is a ballet about a dancer who has to choose between her love of ballet and the love of her partner.  It is a dance of passion and heartache.

Saskia, who is in the Australian Ballet de Corp, tells Tara that she does not have the emotional experience to dance this part: "You're a child, arrogant enough to think that you are an artist!" 


Tara decides to go ahead with the dance, with thoughts of Sammy beside her to help her through, and earns a standing ovation from the audience.  It's such a beautiful scene to watch.

You can see a short vid of this scene on YouTube here .  I cry every time I watch it.... 😢💜

Sorry, no process pics!  I did this spread in acrylics, and really enjoyed putting it together.


Hope you like it Melissa!  Happy Arting all. xx

Cheers, Lisa


Wednesday, January 1, 2020

Under the Sea...!

by Lisa for Melissa

Melissa's journal is a hooge journal full of beautiful papers - I didn't really want to paint over it! 

But I did.  Lots of lovely sea creatures in this journal already, and I decided to go with some fascinating creatures - jellyfish.  Brainless, spineless, dangerous, but strangely beautiful!

I found heaps of lovely photos of jellyfish on Unsplash.  Thanks to Unsplash contributors Karan Karnik, Michael Jasmund, Octavian Rosca, Arushee Agrawal and Kanyon Bollinger for your pics that I've based my jellyfish on!


Firstly I painted my background using acrylic paints.  Whilst I love the colours of the Dylusions paints, I obviously don't use them often enough - sadly they dry out.  My Dylusions Polished Jade was on its last legs, so I mixed it with some other paints in colours of teal and phthalo blue, and sponged it on.  Funnily enough, because the jade was a lot thicker than the other paints, if didn't blend properly, creating a lovely background!  Win!


Next I drew my jellyfish onto the background using my General's white pencil.  It's a bit hard to see in this pic, but it's there!


I coloured my jellyfish using pastel pencils.  And the colours looked beautiful, but pastels are very hard to seal - so it was a bit stoopid of me to use them for a journal!  Sigh, I should have taken a photo of it at this stage.  Oops.

To seal the pastels, I sprayed the pages three times with a sealing spray.  And yes, it did work, but it dulled the colours considerably.  So much so, that it just didn't stand out at all.  A bit of swearing happened here, and then I got out my daughter's Derwents.  And proceeded to colour the jellyfish all AGAIN.  

Next I sprayed the spread again, and added gel pens for highlights.


I also came up with a haiku to add to my right hand page:

Undulating blooms
Glowing in the murky depths
Dangerous beauties

Doing this made me think of Pam... 💜


And here's the whole spread!  Hope you like it Melissa, and here's hoping that 2020 is a great year for all.  Happy Arting!

Cheers, Lisa xx


Friday, September 27, 2019

Memories of the Sea


My darling mama has had a bugger of a year, In March she was diagnosed with cancer and a month ago she had a stroke! Enough already!
Art to the rescue once again. 


Melissa's Under the Sea journal came into the hospital with me and mama told me a story of her favourite Sea memory and it was a holiday we shared about 15 years ago. I was her scribe and her assistant to create this page as mama only has one hand working I think she did very well. 

Diving Deep in Melissa's Magnificent journal


Melissa's Under the Sea journal is a truly beautiful creation.
 Her pages and construction are such a privilege to have around.


I took liberties and created 2 pages
 just because there are so many pages just waiting for play.


Monday, August 5, 2019

"Melissa's Journal -Under the Sea by Meg Atkinson"


Receive Melissa's beautiful hand made Journal- pictures don't do it justice!


I Started my entry using some sprayed and stencilled pages and decided to do an underwater view through an old diving helmet..... except in very bright colours


I wove some strips into the bars to create the look of a porthole and then proceded to fill it with fish


I stamped on sprayed Journal pages then cut the Sea animals out


Ending up with a porthole filled with bright creatures
and a bit of Glossy accents to finish the page off


Monday, June 17, 2019

It's a busy place under the sea


I was looking forward to creating a spread in this journal as I share Melissa's sea obsession. I grabbed all my blue paints...cobalt, cerulean, ultramarine and a light blue metallic. Using these with a dash of yellow to add some green I tried to create a sense of the many blues of the ocean...going from light to dark to mimic swimming from the surface down.


I was really happy with my sea so then I sat down and drew all the creatures I wanted living there. I used a mixture of coloured pencils and crayons to create the mermaids, cuttlefish, starfish, jellyfish, whale, sea ferns, various fish and the sperm whale...the sea of my imagination.
Thank you Melissa xox


Friday, June 7, 2019

Robyn’s World Fashion Journal


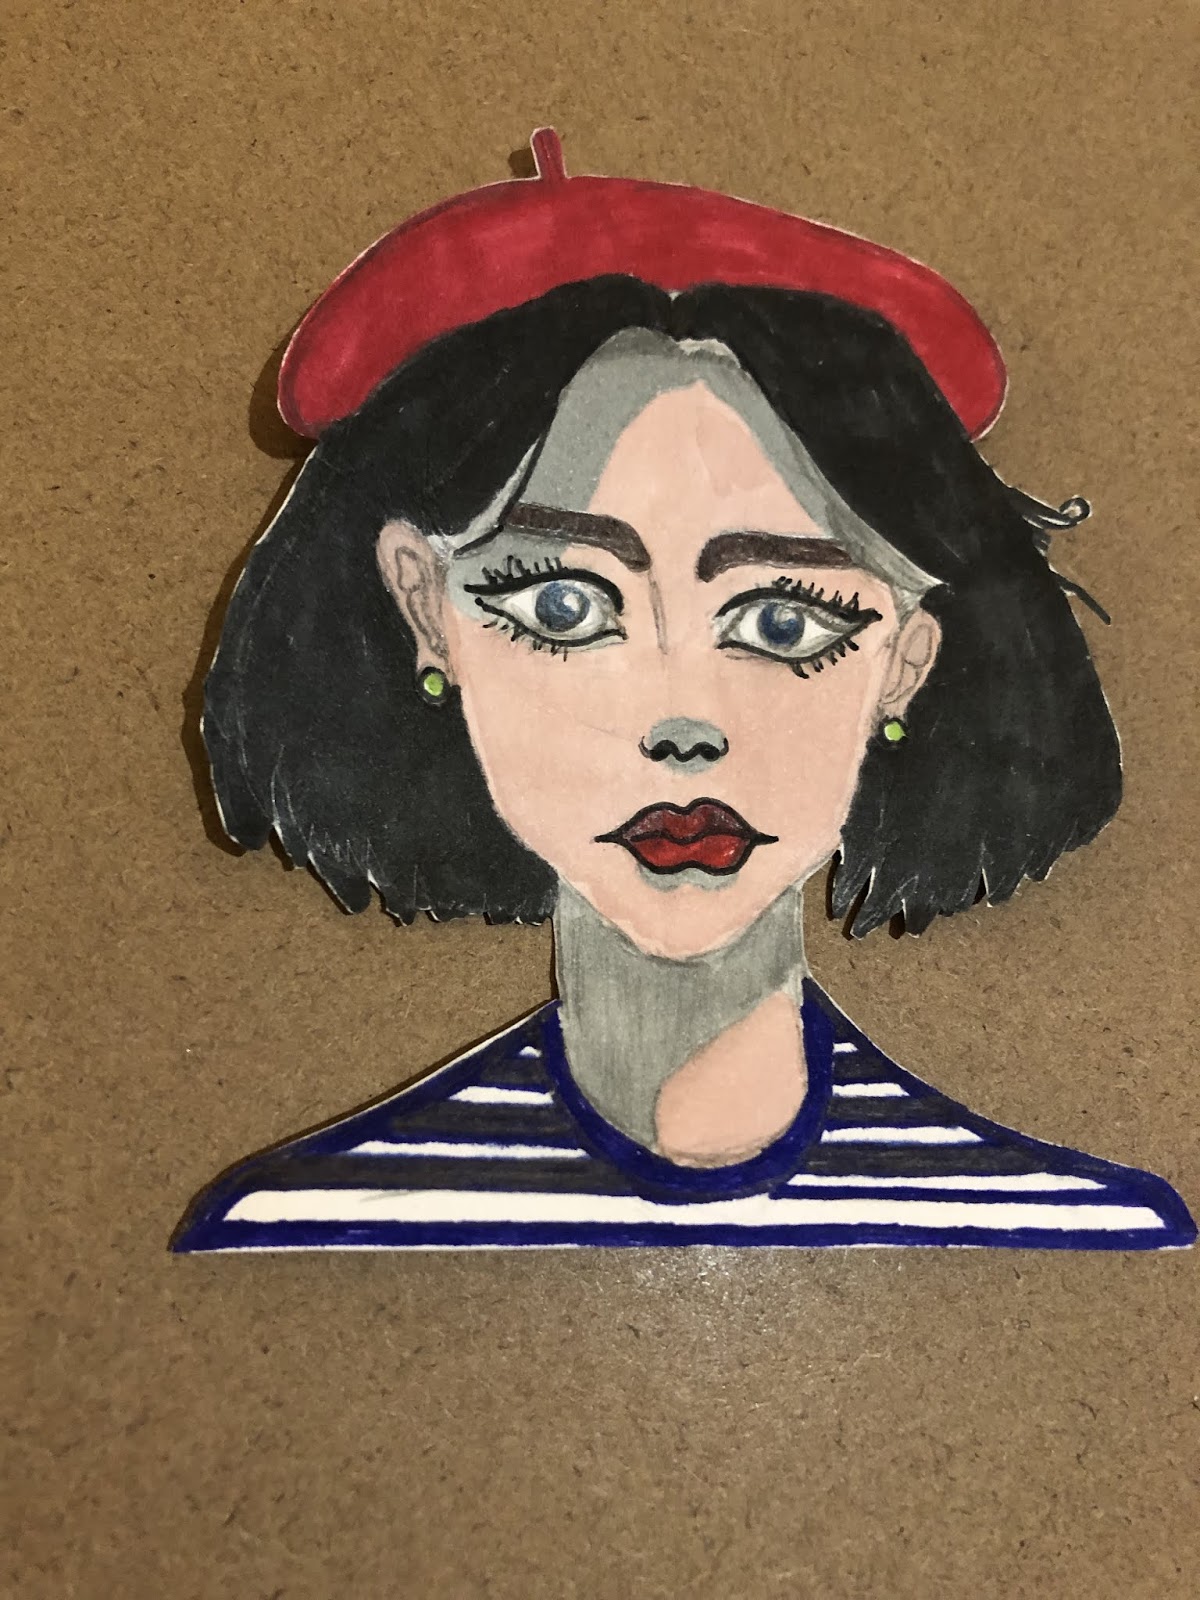
I chose Paris France for my theme in Robyn’s journal.


 Before adding everything I painted the pages blue, white and red to represent the country’s flag.


 I then sketched a lady with a beret and coloured her in with alcohol markers. 


I wanted to include modern and classic French designs, as well as the red beret with the blue and white horizontal striped top, thought of by foreigners as the typical colloquial clothing worn by Parisians. 


I feel their daytime wear is beautiful, effortless and fresh.

 While the fashion can be toned down, at the opposite end of the spectrum one will find that French designers like to liven up their concepts and take their visions to a whole other level, called avant-garde, these show stoppers are magical and spectacular.


Wednesday, May 22, 2019

Melissa Guest's Underwater Journal for May 2019 featuring the Water Babies; by Janie O'Brien

  1. This month I managed to remember to get some shots as I progressed. Melissa provides a humungous journal with more than 120 pages, opening to A3. Too big? Yes I think so; postage is steep at more than $20.00 according to the label when I received it. The paper to work on though is very light and not really fit to paint on. Luckily for me I decided in advance to collage and I chose most of my papers from Pinterest or Google. The above picture shows the background sea water paper I decided for my background. I used photo quality Epson matt papers for my collage elements as these papers display colour really well.
Next I started adding my 'coral' elements
and more......
and more until the bottom 1/3 was filled with coral.
Finally, the top portion of the water was painted in green & turquoise, a snorkeler was added along with water babies fish. Touch ups with marker pens finally added accents.

Friday, May 3, 2019

Vintage Under the Sea

This is my Under the Sea for Melissa Guest inside her amazing book. I love creating underwater worlds, something to do with the gorgeous greens and blues and all the awesome critters and plants! Everything really, its an incredible part of our planet.

progress pic of under the sea stamped mixed media artwork created by Jenny J
After adding a strip of white washi tape along the centre spine, I covered the whole double spread with clear gesso to preserve that beautiful oval frame and to make sure the watercolours and Distress Inks didn't go through the paper. It seemed to work well :)

progress pic of under the sea stamped mixed media artwork created by Jenny J
Once that gesso was dry, I sprayed the pages with green and blue Tim Holtz Distress Ink Spray Stains (Peacock Feathers, Mermaid Lagoon and Twisted Citron), using a paint brush to spread it to the edges of the pages. Once dry, I spritzed it with water which made it look more washier (that's a real word), which was fine because it was supposed to be water!

progress pic of under the sea stamped mixed media artwork created by Jenny J
Using blue Distress Ink Pads (Faded Jeans and Peacock Feathers), I stamped Darkroom Door Background Stamps (Polka Dots, Peeled Paint and Circles) without a clear block so I could press the rubber stamp onto the paper easier. Clear blocks are perfect to use when your surface is flat but get in the way when working on hills and valleys!

progress pic of under the sea stamped mixed media artwork created by Jenny J
Using a much darker green Distress Ink Pad (Pine Needles), I stamped Darkroom Door Background Stamp, Weathered Wood across the bottom edge of the both pages, again without the acrylic blog... and then liking what I saw, I called it seagrass :)

progress pic of under the sea stamped mixed media artwork created by Jenny J
With the ground and water basics done, it was time to add some creatures... more Darkroom Door stamps! I used the Sea Shells stamp set with Distress Ink Pads (Forest Moss, Lucky Clover, Walnut Stain and Pine Needles), using the acrylic block about half the time.

progress pic of under the sea stamped mixed media artwork created by Jenny J
The above photo shows how the background once I'd finished, just before adding the bubbles, seahorses and their friends.

progress pic of under the sea stamped mixed media artwork created by Jenny J
Its under the sea, so it needed some shiny watery elements... out came the Ranger Gloss Gel Texture Paste and the Dylusions Stencil (Holes, one of my faves). I applied the gloss gel through the stencil with a palette knife (Tim's of course!) then waited for it to dry.

progress pic of under the sea stamped mixed media artwork created by Jenny J
Getting there... I wanted to keep the page with a vintage feel so instead of using black, I stamped the seahorses (Tim Holtz SeaLife Stamp Set) straight onto the page in a dark brown Archival Ink. The quote from Darkroom Door, "Believe in the beauty of your dreams" is stamped in black onto mixed media paper before giving the paper a wash of green and blue, edging in brown.

progress pic of under the sea stamped mixed media artwork created by Jenny J
What to do when waiting for layers to dry? Stamp, colour and cut out your friends! Everything was stamped onto mixed media paper using dark brown Archival ink, then each one was colouring in watercolours, Tim's Distress Inks and Jane Davenport's Mermaid Markers. Once dry, they were all cut out with fine sharp scissors and had their edges inked with Distress Ink (Walnut Stain). This seems to help them blend into the page better.

under the sea stamped mixed media artwork created by Jenny J
This is the final page... you can't really see, but the bubbles are still there, all shiny and raised and the fish and a few other areas have spots of Glossy Accents on them. Everything is glued down with gluestick. The crab couldn't help himself, he just had to have a chew on the sign while his friend eyed off the seahorses with his newly drawn on eyes (black pen).

Hope you like it Melissa :) It was fun to create.

Thanks so much for visiting and reading this far! I do hope it helped you smile today!

Happy Creative Arty Crafty Day!
:)
Jenny

Wednesday, May 1, 2019

Pam's HAIKU Journal

Hi there ladies,

I loved contributing to this project. Around 22 years ago I first learnt about Haiku poems, I really enjoy the simplicity of this type of poetic structure. At first I started off with something completely different to the outcome of the piece, I guess that's just the way process journey goes.


I started by laying down an opaque gesso, waited for it to dry, then adding an aquamarine and light mint on the right and left hand side of the journal pages. After it dried, I picked out a Jane Davenport stencil and used a thick black marker to outline the details of the face, I drew the hair in. I wanted to try something different, so I ripped up some beautiful paper and began to paste all the pieces down with pva glue.


I added some matchmaker acrylic paint, it's a customizing skin colour blend, at first I finished with the above matchmaker mix, but in the following you will see that I added more brown for definition; well I tried haha.


So this is the mix I ended up with. I added four Haiku's, I liked them all very much but I didn't like the way I presented them, so as you'll see I totally changed the background layout.


I went through all of my paper stock and came across typed words 12 x 12. I like the effect of the ripped up paper so much so that I decided to do the same with the back ground. I used washi tape for the young lady's eyes, I wanted to add something different. I love the way it came out. Now I needed to decide where I was going to present my Haiku's.


I didn't want to overload the whole area as it looked very busy as it was, so I wanted to tuck the poetry away in a fun little spot. I used washi tape to line the edges as well as plain sticky tape to protect the marker used to write the poem and to also protect any washi from coming away. I thought I'd use a little velcro closure to keep the tuck spot lid closed. I like the way that it reveals a little poem inside. I used some aqua pastels to colour within the small areas of the triangles, just to give them a bit of something.


This is a wide view showing the tuck spots open.


Another wide view in Black and white with tuck spots closed, just for something different. I decided to put two poems on there, I didn't want too many on the page at once as it just didn't feel right, I felt like they were all taking something away from each other, so two was enough.


All in all, I had a wonderful time creating in this journal and trying to put words together about subjects I love, I hope you like what I did Pam, it was a lot of fun.