Friday, November 30, 2018

Dreams & Fantasies by Colleen For Robyn


I've always wanted to fly & I often have a re-curring dream that I can, in-fact Fly.

So it had to be fairies & butterflies. I was lucky enough to have only recently found this paper from Kaisercraft with Fairies. Just perfect.

I began by glueing down paper towel that was covered in lots of inky colours. I then sponged on colours through stencils to get a nice soft floral looking background. Then fussy cut my images & glued them on. Stamped the words, went over them with black pen & outlined with white paint pen. 

I love it. It's so soft looking & I can fantasize that I am flying through a floral garden.

Hope you like it Robyn.

Wednesday, November 28, 2018

Louise in Wonderland


Alice blew into Grafton is a whirlwind of crazy activity, I had a vague idea of what I wanted to do so I gessoed my spread in black and Debs gorgeous little journal sat patiently waiting for me to find the time to play day after day and suddenly- its the end of the month!


Deadlines are great motivators, I had a day off today and besides the other million things, I needed to do I made sure to put some time aside to play- and play I did!


I wanted a grungy background with the iconic image of Alice stripped back to a silhouette and the harlequin diamond pattern distinctive but grungy. Where to next? I was lost and then I remembered the quirky wrapping paper I picked up at IKEA recently so cut out some collage pieces to add.


The flower faces and the mushrooms were rather Alice-ish and as it's my wonderland the funny little woodland creatures came along too. 


Sunday, November 25, 2018

Lisa being Exotic in Janie's journal!

Great theme that Janie picked, but what to do...!  I thought about it for a while, then decided that what 'Exotic' had always meant to me, was exotic places.  

For me, this brought to mind dusty marketplaces with a myriad of little lane ways, filled with old trinkets, bags of spices, and bolts of brightly coloured material - the medinas of Marrakesh in Morocco.


So I trawled through Pinterest looking for inspiration.  And the things that popped out for me, weren't market pics at all, but doors!  So I had to change my idea and go with this instead!

I didn't take any progress pics.  Janie's journal is very long, and it took a while to decide on how to best use it.  All of the pics I wanted to use were portrait, not landscape, so didn't really fit well!

In the end I opted to do four different scenes across the double page, and I like how it turned out.  I gessoed the pages, drew my scenes in pencil, outlined them in waterproof pen, then painted with watercolour.  I recently bought a new Koh-I-Noor round 6 palette called Summer Collection, and the bright colours were perfect for this!

So here are the four panels:


And the whole spread:


Hope you like it Janie; I had fun painting loosely with these bright colours!

Cheers, Lisa

Saturday, November 24, 2018

Janie and Cleo in Egypt


November brought me Annabelle Reid's Egyptian Journal to play in which I did with colour and much fun. Watercolour and sprays were used for the background. The bottom black & white border was an Egyptian stamp on tissue then cut & stuck. The rest of the images were taken from Pinterest, resized and fussy cut. Cleo's make-up and adornment were enhanced with various colours of pure gold, lapis lazuli, turquoise and emerald.

Pam's Attempt at Art Nouveau.


This month I had the privilege of working in Roz's beautiful Art Nouveau art journal. It is a really nice size and very beautifully made.  Roz you are going to adore it when you get it back, it is so beautiful.  It is also quite interactive with some works done landscape format, others portrait and still others in what I may call reverse landscape.  Hello Janie. You will just have to wait and see.

I started out with some Lindys Stamp Gand sprays, I was after bling.  Then I ruled out my grid and drew in the design.  For the colour I used some pearl water colour paints I have.  The outcome is very pretty.

I added a quote by Elizabeth Kubler Ross and called it done.  I hope it fits the bill Roz.


Wednesday, November 14, 2018

Crazy Galahs with Wise Words

Pam's Words of Wisdom Book by Jenny

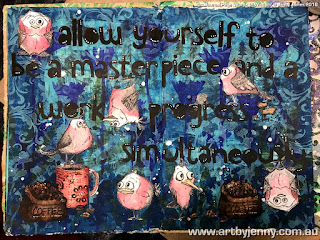
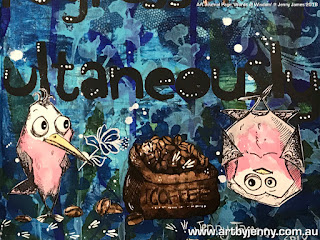
With the Bee Gees playing in the background, I created this page for Pam using acrylic paints, gorgeous printed tissue paper and the adorable Crazy Birds stamps from Tim Holtz.

The quote says :
Allow yourself to be a masterpiece and a work in progress simultaneously.
choosing the papers to use on the art journal page
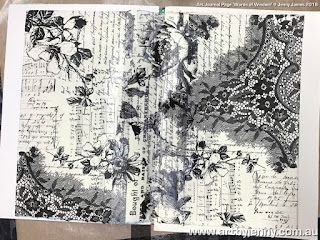
The first thing to do is not to get sidetracked by all the pretty designs on all the tissue collage papers and just rip it up already! I used the gorgeous Tim Holtz Collage Papers, "Vintage Lace" and "Botanical".

Overview of Tim Holtz Collage Paper being stuck down with matte medium by Jenny James
I used a gel matte medium to glue all the layers down. The tissue seems to disappear within itself and dries to show just the printed design. I painted a smidge of white gesso behind a few areas so where it overlapped, the text didn't take over the flowers.

a splash of blue acrylic paint with a brayer on Tim Holtz Collage Tissue Paper
Squirt on splashes of 2 different colours of acrylic paint (I used a light and dark blue). Using a hard rubber brayer, roll the paint over the page, back and forth, up and down, until you like what you see. Not too much rolling though, you don't want to mix the paint, just allow the colours to blend a bit.

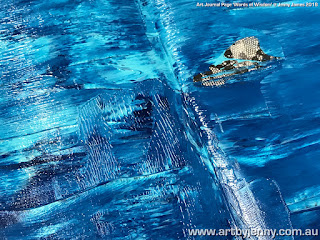
close up photo of blue acrylic paint drying
Above is a closeup of the smooshed paint showing the bare areas and gorgeous blends. The next step needs to be done while the paint is still wet.

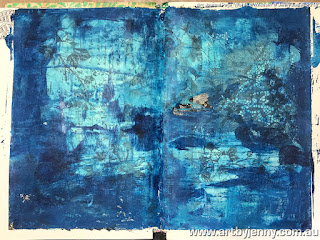
painting a background using acrylic paint and collage tissue paper
Monoprinting without a linocut or gel printing plate - simply place a spare sheet of paper onto the wet surface of the book. Then using a soft rubber brayer, roll quite firmly. This lifts off excess paint off the page and transfers it onto the paper to use for another day.

painting a printed background using acrylics and tissue collage paper
Above photo is of the page after it has dried. You can use any printed paper (commercially or stamped) under the paint to get a similar effect.
Just like with gel plate printing, every one is different. The various paints, papers, environment (hot, cold, dry, humid, etc), time taken and people's techniques will alter the results.

art journal page by Jenny James featuring a wildflower stencil
Above... the first stencil layer was added using Dylusions Acrylic Paint in Midnight Blue through the Darkroom Door Large Blossom Stencil.

an art journal page by jenny featuring blue acrylic paints and beautiful stencils
I had bit of Midnight Blue left on my craft sheet, so mixed in a touch of Lemon Zest (Dylusions) and blended this groovy green through the Darkroom Door Large Fern Stencil. Using the same green paint, I grew some pine trees in the distance using Tim Holtz Pines Layering Stencil.

Next I added Tim Holtz Wildflowers Layering Stencil using light blue paint, staggering the design across the page, and Tim's Flourish Stencil around the sides and across the top. Then blended dark blue paint through Tim's Blossom Stencil all across the bottom of the page.

How to use a spray bottle to create spatters on an art journal page
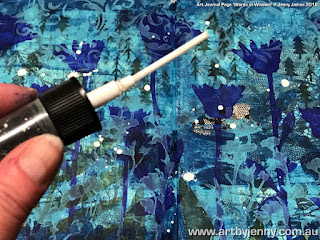
While those layers of blue were drying, I splattered on Dylusions Ink Spray in White Linen shaking and tapping the sprayer's straw to send drops flying. The ink goes wherever it wants :)

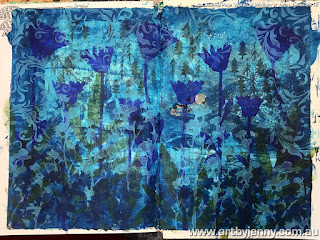
a beautiful blue garden made of paint and stencils by Jenny
Above shows the page after I've finished spattering ink. So different to how it all started out. I love how even tiny specks of white gives life to all colours.

close up photo of how to use foam stamps with paint to create a page
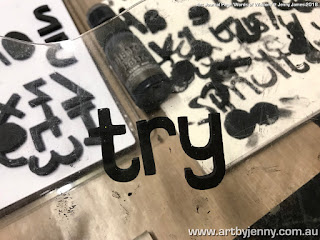
I decided to make the quote large enough that it would take over the whole page. Using Tim Holtz Idea-Ology Foam Stamps Cut Out Alpha and Distress Paint in Black Soot, I printed out my words.
This photo is here to show how easy it is to line up letters and form words using foam stamps. Hope Tim creates more styles!

Subliminally, it says to you "have a go, try some art, get paint on your fingers" :D

close up photo of black lettering stamped in paint
Some words took a bit of planning as they had multiples of the same letter and I got a bit close to the edges of the page but it all worked out in the end. Tim Holtz Idea-Ology Cling Foam Stamps - Cutout  is a flexible, forgiving font that allows for crooked stamping and letters not lined up!

planning of the art journal page using Tim Holtz Stamps
My friends, the Crazy Birds of Tim, came to join the party... the other stamp sets I've used are Tim Holtz Cling Stamps - Fresh BrewedTim Holtz Cling Stamps - Haunted House (the little here and there sign) and Tim Holtz Cling Stamps - Floral Tattoo (details on the mug). Having the stamps printed on the back like this makes it easier to see what you're doing, or rather, planning...

photo showing placement of the Tim Holtz Crazy Birds and Fresh Brewed images
But as you can see, the birds didn't want to stay where I'd planned and moved my mug but that's ok, they didn't drink all the coffee so we're still friends :) lol

colouring Crazy Birds and Coffee Beans with Distress Inks
I love our Aussie Galahs... To colour everything, I've used Distress Ink Pads dabbed onto a craft sheet, using a waterbrush to pick up the ink and colour in.
All the galahs were coloured with Worn Lipstick and Black Soot, while the coffee bags were coloured with Ground Espresso, Walnut Stain with Black Soot in the shadows. The mug was also Worn Lipstick but using more layers of ink to get it darker, then stamped over with Floral Tattoo using Ground Espresso.

close up of the coffee and mug with the Crazy Birds
I was going to add a splash of Glossy Accents above the mug to show it was hot and steamy, but one of the cheeky birds got in the way!

almost done - Australian Galahs artwork created, stamped and painted by Jenny James 2018
The above photo is of everyone in their final places, stuck down and waiting for the next bright idea. All the eyes were enhanced with black and white paint pens.

completed Australian Galahs artwork created, stamped and painted by Jenny James 2018
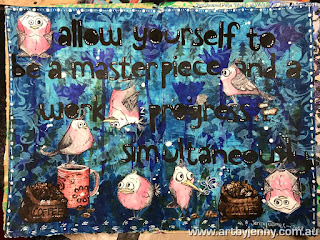
After the paints and inks had completely dried, I used a white paint pen to add a few details like the word "in" (next to progress),  couple more highlights everywhere, a flower, and a border of dots, dashes and footprints.

close up of Australian Galahs artwork created, stamped and painted by Jenny James 2018
Thanks for reading and checking out the photos of my art journal page for Pam.

Have a happy creative day!
:)
Jenny


Monday, November 12, 2018

My spread in Janie's EXOTIC Journal

I started by looking through some magazines for Exotic images and found the lady first. I then looked for things to go with her...most of them didn't get used.
I used a stencil and glimmery spray ink to cover the 2 pages and it does show through a bit on the 2nd page.
It took a while before the spread started to come together. I used 2 different napkins to create the background and fiddled with placement until I was happy. I added the embellishments...sparkly flowers with red gems, the purple flower with bling, the peacock feather and some trim.
Hope you like it Janie...slightly out of my comfort zone and lots of fun.


Tuesday, November 6, 2018

This is my page in Lisa Joans Music and Lyrics Journal I chose Edd Sheeran's Perfect as my song as I love it. Then I decided to add this photo I thought it went perfectly  with the song  hope you like it Lisa xxx

Monday, November 5, 2018

Colleen's page in Roz willoughby's journal


Roz's Art Nouveau journal had me stumped for a while. I looked up some images on pinterest & came across Tiffany lamps, & thought "YES". I have always wanted one. 
No progress photos this time. For the background, I printed some floral images & glued them down. It looked like wall paper. I then printed a lampshade picture onto a gelli print I had, that was greeny, yellow colours. I then traced & cut the flowers & border onto a pinky gelli print & paper pieced them over the top. Did the outlining & drew in a stand I love how it finished up. 
Hope you like it too Roz.